


Providing Exceptional Service & Value to our Partners Since 1967

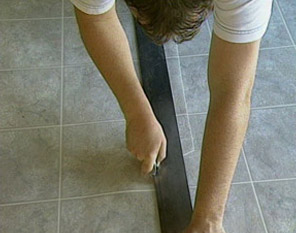
Vinyl Installation

Owning a home is all about being prepared. Preparing your home for seasonal changes, preparing for guests and now preparing for the arrival of new vinyl flooring. Being ready for the installation of your new vinyl flooring will make the entire process go faster, more efficiently, and hopefully eliminate any surprises.
Use a professional
- This type of floor is heavy, difficult work
- It’s labor intensive and extremely exacting
- Not for the do-it-yourselfer
- Installing vinyl flooring is a skill that is developed through years of experience
Subfloor preparation
- Installing over a wood substrate, an underlayment will generally be necessary
- Installing over a concrete substrate will not require an underlayment but will require some floor preparation
- Pay attention to the height of your appliances to counters and cabinets if an underlayment is required
- Strongly recommended that existing flooring be removed, to ensure a proper high-quality installation before installing new flooring
- Professionals determine if your existing vinyl flooring is acceptable or if it will need to be removed
Install Methods
Full Spread
- The adhesive is troweled over the entire substrate
Perimeter Adhered
- Installation method in which adhesive is only applied to the perimeter of the flooring and also at the seams
Floating
- Type of installation in which the vinyl flooring is not bonded to the substrate by an adhesive
Before Installation Day
- Relocate furniture
- Empty china cabinets and closets
- Consider removal and disposal of old floorcovering
- Remove it yourself and leave 1 day before install
- Moldings and baseboards need to be removed for vinyl installation
- Installers not responsible for damage or breakage due to dry or brittle wood
- Painted baseboards, woodwork and paint may need retouching (this is your responsibility)
- Existing subfloor may need to be prepared to receive the vinyl
Door Plan
- Possibility that doors may not clear the new floor and swing free
- Installers may remove doors and rehang for an additional cost.
- For clearance issues, arrange for a qualified carpenter to shave or cut down
Clean-up
- Waste will be produced
- Waste collected and disposed of by installers at an additional cost
Installation Day
- Be home and available
- Be prepared for questions
- Presence ensures the right wood is installed in the right areas
- Exact time of arrival cannot be guaranteed, only a time frame
Safety
- Installers use tools and techniques that can be hazardous
- Make sure that children and pets are out of the work area
- Follow through with a walk through
- Prior to completion, walk through to ask questions and be clear on any final details
After Installation Day
- Establish good ventilation for 48 to 72 hours